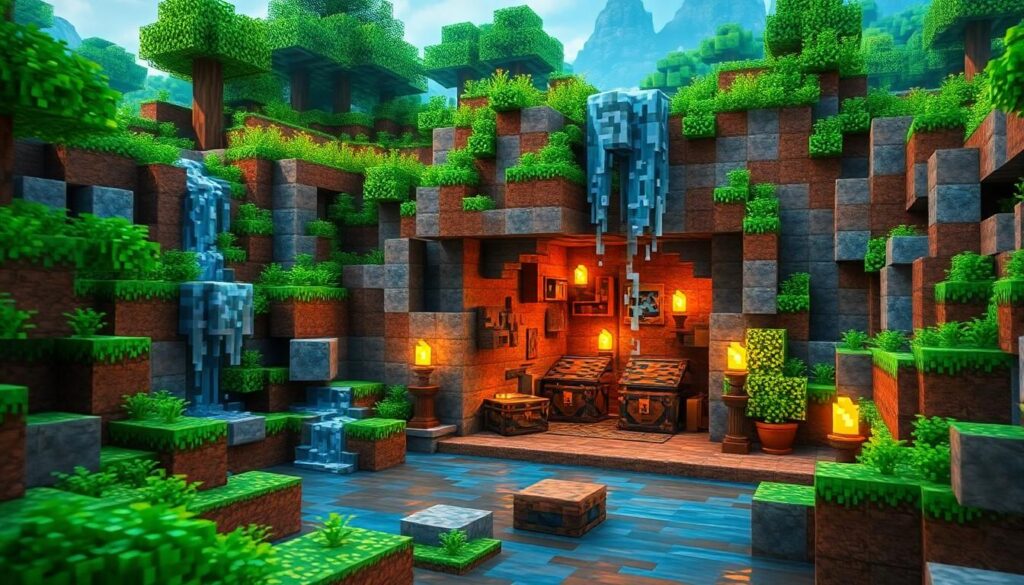
Minecraft’s blocky aesthetic makes it uniquely suited for pixel art, those massive 2D images that transform landscapes into gaming tributes, memes, and original artwork. Whether you’re building a life-sized Pikachu on a mountainside or recreating the Among Us crewmate for your server spawn, pixel art has become a staple of Minecraft creativity. The grid-based building system, combined with Minecraft’s massive palette of colored blocks, gives players everything they need to translate digital images into monumental in-game sculptures.
In 2026, pixel art continues to thrive across Java Edition, Bedrock Edition, and even modded servers. The community has refined techniques, developed powerful external tools, and pushed the boundaries of what’s possible with strategic block placement. This guide covers everything from choosing the right wool colors to using advanced conversion software, helping both newcomers and veteran builders level up their pixel art game.
Table of Contents
ToggleKey Takeaways
- Pixel art in Minecraft transforms images block-by-block into large-scale 2D structures, with the grid-based building system making it perfectly suited for converting digital images into monumental in-game sculptures.
- Essential materials for pixel art include wool blocks for color variety, concrete blocks for saturated colors, and specialized tools like the /fill command and external converters (Spritecraft, Minecraft Image Converter) to streamline building.
- Start with 32×32 or 64×64 projects to build confidence before attempting massive undertakings, and always test color swatches before committing thousands of blocks to ensure accurate visual results.
- Advanced pixel art techniques include 3D voxel designs, manual shading with darker and lighter color variants, and dithering patterns to create depth and simulate lighting effects.
- Share completed pixel art with the Minecraft community through Reddit’s r/Minecraft, Planet Minecraft, Discord servers, or social media, including technical details like dimensions, blocks used, and build time for better engagement.
- Avoid common mistakes such as starting too large, ignoring lighting considerations, building without a cleared workspace, and choosing overly complex images without simplifying them first.
What Is Pixel Art in Minecraft?
Pixel art in Minecraft refers to large-scale 2D images built block-by-block, where each colored block represents a single pixel. These creations can range from simple 16×16 icons to massive 256×256 murals that dominate server landscapes. The concept borrows from traditional pixel art, think classic 8-bit and 16-bit game sprites, but scales it up into three-dimensional space.
Unlike sculptures or architectural builds that require depth and structural complexity, pixel art focuses on flat visual impact. Players typically construct these on the ground, against cliff faces, or as floating structures in the sky. The challenge isn’t structural engineering but color accuracy and scale management.
Why Pixel Art Is Perfect for Minecraft
Minecraft’s fundamental grid system makes it naturally compatible with pixel art. Every block occupies exactly one unit of space, creating an automatic pixel grid. This eliminates the need for complex scaling calculations, what you see on a reference image translates directly to block placement.
The block palette in modern Minecraft offers impressive color variety. With 16 wool colors, multiple terracotta variants, concrete blocks, and specialized materials like glazed terracotta, builders have access to dozens of distinct shades. This allows for surprisingly accurate color matching when converting external images.
Pixel art also serves as an accessible entry point for new builders. Unlike redstone contraptions or massive architectural projects, pixel art requires minimal technical knowledge. The process is straightforward: pick your colors, follow your reference, place blocks. There’s immediate visual feedback, and mistakes are easy to spot and correct.
Essential Tools and Materials for Minecraft Pixel Art
Success in pixel art depends heavily on preparation. Having the right blocks stockpiled and knowing which tools streamline the process can cut your build time significantly.
Best Blocks for Pixel Art Projects
Block choice determines both color accuracy and resource efficiency. Here’s what experienced pixel artists prioritize:
Wool blocks remain the go-to for most projects. They’re easy to farm with shears and sheep, available in all 16 standard colors, and have consistent, vibrant textures. White, black, red, blue, yellow, green, orange, pink, light blue, magenta, lime, cyan, purple, brown, light gray, and gray wool cover the essential spectrum.
Concrete blocks offer slightly more saturated colors than wool and have cleaner textures without wool’s subtle noise pattern. But, they require conversion from concrete powder using water, which adds a production step. They’re worth it for projects demanding sharp color purity.
Terracotta and glazed terracotta provide earthy, muted tones perfect for skin tones and natural subjects. Standard terracotta comes in 16 colors with warmer hues than wool, while glazed variants offer patterned textures that can add depth at distance.
Specialty blocks like colored glass, carpet, or even specific wood planks can fill niche color needs. Prismarine blocks and variants give unique blue-green tones unavailable elsewhere.
Essential In-Game Tools and Commands
The right tools make placement faster and more accurate:
Creative mode is non-negotiable for large projects unless you’re committed to grinding resources. Infinite blocks and flight make pixel art practical.
/fill command (Java Edition and Bedrock with commands enabled) becomes invaluable for large solid-color sections. Instead of placing hundreds of blue concrete blocks individually for a sky background, /fill x1 y1 z1 x2 y2 z2 minecraft:blue_concrete handles entire regions instantly.
/clone command lets you duplicate sections, perfect for symmetrical designs or repeated patterns.
Structure blocks allow saving and loading sections of builds, useful for templates or backing up progress on complex projects.
External Tools and Software for Planning
External tools separate amateur pixel art from polished builds:
Spritecraft (Windows) has been the classic converter since Minecraft’s early days. It takes any image file, analyzes colors, and outputs a block-by-block plan with material lists. The interface feels dated in 2026, but it’s reliable and free.
Minecraft Image Converter (web-based) offers similar functionality through browsers, making it accessible on any platform. Upload an image, select your target dimensions, and it generates layer-by-layer building instructions.
Pixelated (web tool) provides more granular control over color palettes and block selection. You can exclude certain blocks if your server restricts them or if you prefer specific aesthetics. Online modding platforms sometimes host custom conversion tools with enhanced features.
GIMP or Photoshop help with pre-processing images. Scaling, cropping, color adjustment, and posterizing effects let you optimize reference images before conversion. Reducing color counts to match Minecraft’s palette prevents conversion tools from making poor approximations.
Step-by-Step Guide to Creating Pixel Art in Minecraft
Breaking pixel art into systematic steps prevents overwhelming midproject confusion and ensures quality results.
Choosing Your Design and Reference Image
Image selection determines project difficulty and visual impact. Simple designs with bold outlines, game logos, cartoon characters, iconic symbols, work better than complex photographs with subtle gradients.
Resolution matters significantly. A 64×64 pixel image translates to a 64×64 block build, which stands 64 blocks tall. That’s manageable. A 256×256 image becomes a massive undertaking requiring serious time investment. Beginners should start with 32×32 or 48×48 projects to build confidence.
Subject matter with strong silhouettes and limited color palettes converts more successfully. Mario, Pokémon sprites, Among Us characters, and corporate logos typically work great. Realistic portraits or landscape photos often look muddy due to Minecraft’s limited color resolution.
Converting Images to Minecraft-Compatible Pixel Art
Once you’ve selected and prepared your image, conversion tools do the heavy lifting. Upload your reference to your chosen converter, for this example, using a web-based tool.
Set your target dimensions. Most converters let you specify maximum width or height, automatically calculating the other dimension to maintain aspect ratio. Remember that vertical builds are easier to view in-game than extremely wide horizontal ones.
Select your block palette. Enable all standard blocks or restrict to specific types if you’re building in survival mode with limited resources. Some tools let you exclude certain colors entirely.
The converter outputs a color-coded grid and material list. Download or screenshot this, it’s your blueprint. Advanced tools provide layer-by-layer instructions, showing which blocks to place at each Y-level.
Building Your Pixel Art: Techniques and Tips
With blueprint in hand, actual construction becomes methodical:
Mark your boundaries first. Place temporary markers at the corners and midpoints of your build area using easily visible blocks like gold or emerald blocks. This prevents accidental misalignment.
Work row by row from bottom to top. Starting at ground level and building upward makes it easier to reference your blueprint and spot mistakes before they compound. Players creating creative projects often find systematic building reduces errors.
Build a scaffolding layer behind your pixel art. Placing cheap blocks like dirt or stone in a solid wall behind your colored blocks provides a work platform and prevents accidentally seeing through your build. Remove it after completion or leave it if the back won’t be visible.
Use the grid pattern in your blueprint. Most converters add grid lines every 10 blocks. Place marker blocks at these intervals on your actual build to maintain alignment as you work through large sections.
Double-check every few rows. Step back and compare your progress to the reference. Catching a color mistake after 5 rows is annoying: catching it after 50 rows is devastating.
Popular Pixel Art Ideas and Themes for Minecraft
Certain subjects have proven consistently popular across servers and creative communities.
Gaming Characters and Logos
Gaming references dominate Minecraft pixel art for obvious reasons, your audience already knows and appreciates these characters. Classic choices include:
- Super Mario series sprites: Mario, Luigi, mushrooms, fire flowers, and question blocks translate perfectly to Minecraft’s aesthetic
- Pokémon: Every generation provides instantly recognizable subjects, from original Gen 1 sprites to modern designs
- Zelda franchise icons: Triforce symbols, Link sprites, and heart containers are server staples
- Among Us crewmates: Their simple design and cultural relevance made them explosion popular for pixel art
- Minecraft’s own mobs: Creeper faces, Enderman, and Steve heads feel meta but work surprisingly well
Game company logos, Nintendo, PlayStation, Xbox, Steam, also make popular spawn area decorations. Detailed gaming guides frequently showcase these types of builds in their community features.
Anime and Cartoon Favorites
Anime and cartoon aesthetics align naturally with pixel art’s stylized nature:
- Dragon Ball Z characters: Goku, Vegeta, and other iconic fighters with their distinctive hair work well at larger scales
- Naruto series: Headband symbols and character portraits are common server builds
- One Piece: The Straw Hat Pirates’ jolly roger and character sprites appear frequently
- Rick and Morty, Adventure Time, and other Western cartoons with simple, bold designs convert excellently
These builds often become focal points for themed servers or faction bases, giving community spaces distinctive visual identity.
Custom Portraits and Original Designs
Advanced builders move beyond recreating existing images to creating original pixel art:
Custom server logos and banners give communities unique branding. These often incorporate server names, mascots, or inside jokes meaningful to regular players.
Player skin portraits immortalize server members or commemorate events. Taking someone’s Minecraft skin and scaling it up to 64×64 or larger creates personalized monuments.
Original characters and scenes designed specifically for Minecraft showcase true artistic creativity. Some builders sketch designs first, then convert them to the Minecraft palette rather than starting with existing images.
Advanced Pixel Art Techniques for Experienced Builders
Once you’ve mastered basic flat pixel art, these techniques add complexity and visual interest.
Creating 3D Pixel Art and Statues
3D pixel art extends flat designs into volumetric space, creating sculptures that look good from multiple angles. This requires thinking about depth and profile views, not just the front face.
The simplest approach starts with a flat pixel art front and back, then connects them with side profiles. A Creeper head, for example, uses the familiar green face pattern on front and back, with simplified side views showing the head’s depth.
More complex 3D pixel art requires voxel planning. Tools like MagicaVoxel let you design 3D pixel models outside Minecraft, then import them using schematics. This workflow suits characters with distinct volumes, think Kirby, Pac-Man, or rounded mascot characters.
Layering creates pseudo-3D effects even in flat builds. Placing darker blocks slightly behind lighter ones adds shadow depth. Building your pixel art with a one-block offset every few layers creates a stepped appearance that catches light differently.
Shading and Color Gradients for Depth
Basic pixel art uses flat colors throughout. Advanced work incorporates shading to simulate lighting and volume.
Manual shading involves selecting darker or lighter variants of your base colors and placing them strategically. For a red sphere, you’d use red concrete for mid-tones, red terracotta for shadows, and pink concrete or wool for highlights. This requires understanding light sources and form.
Dithering techniques from classic pixel art apply in Minecraft. Checkerboard patterns of two similar colors create the illusion of an intermediate shade. Mixing light gray and white wool in a checkerboard gives the appearance of a very light gray unavailable in the standard palette.
Gradient layers work well for backgrounds or large uniform areas like skies. Transitioning from dark blue at the top through light blue to white at the horizon creates depth. The realistic texture approach to Minecraft builds translates well to pixel art shading.
Color theory becomes crucial at this level. Understanding complementary colors, color temperature, and saturation helps you make palette choices that pop visually rather than appearing muddy.
Common Mistakes to Avoid When Making Minecraft Pixel Art
Learning from others’ mistakes saves countless hours of rework:
Starting too large too soon is the classic beginner error. A 256×256 pixel art sounds impressive until you’re 40 hours in and losing motivation. Start with 32×32 or 64×64 projects. Smaller builds teach the fundamentals without the grinding tedium.
Ignoring color testing leads to poor block choices. Different blocks render differently depending on lighting, time of day, and surrounding blocks. Place sample swatches of your intended palette before committing to thousands of blocks. What looked perfect in your inventory might look washed out on a hillside.
Building without a cleared workspace creates alignment nightmares. Trees, terrain variations, and existing structures interfere with accurate placement. Flatten your build area or use /fill to clear a proper canvas. Building creative structures requires proper planning.
Forgetting lighting considerations ruins night visibility. If your pixel art will be viewed after dark, ensure the area is well-lit. Hiding light sources behind the build or using glowstone and sea lanterns strategically prevents your masterpiece from disappearing at sunset.
Not backing up progress on large projects invites disaster. Griefers, accidental TNT, or corrupted saves can destroy days of work. Use structure blocks to save sections periodically, or back up your world files after each build session.
Choosing overly complex images without simplifying them first results in muddy, illegible builds. Photos with subtle gradations, realistic portraits with detailed shading, or images with hundreds of colors don’t translate well to Minecraft’s limited palette. Posterize or simplify your reference image before conversion.
Misaligning grid references compounds errors exponentially. If you’re off by one block on row three and don’t notice until row fifty, you’ll either rebuild rows 3-50 or accept a permanently skewed image. Frequent checks against reference points prevent this.
Showcasing and Sharing Your Pixel Art Creations
Completing your pixel art is only half the journey, sharing it with the community completes the creative loop.
Best Practices for Screenshots and Recording
Poor screenshots waste great builds. Follow these guidelines:
Use proper distance and framing. Position yourself far enough back to capture the entire build with minimal distortion. F1 (Java Edition) or the hide HUD option (Bedrock) removes UI elements for clean shots.
Optimize lighting and time of day. Noon provides even, bright lighting without long shadows. For dramatic shots, sunset or sunrise creates interesting color temperature shifts, but ensure your pixel art colors remain visible.
Consider shaders for beauty shots. While vanilla screenshots work fine, shader packs add lighting effects, shadows, and depth of field that make builds pop. BSL Shaders and Complementary Shaders are popular 2026 choices. Gaming coverage from major outlets often features shader-enhanced builds.
Capture multiple angles. Front-on shots show the full design, but angled views demonstrate scale and integration with the environment. Close-ups highlight detail work.
Create time-lapse videos for massive projects. Recording your build process from start to finish, then speeding it up, provides satisfying before-and-after content. Use Replay Mod (Java Edition) for smooth camera movements without manual recording.
Where to Share Your Builds Online
Multiple platforms cater to Minecraft builders:
Reddit’s r/Minecraft remains the largest general Minecraft community. Posts with clear titles, good screenshots, and build stats (dimensions, time spent, block count) perform well. Avoid low-effort posts that just say “look what I built” without context.
Planet Minecraft specifically caters to sharing creations. Upload screenshots, world downloads, and descriptions. The site’s community actively comments and favorites builds, providing feedback and recognition.
Minecraft Forum (still active in 2026) has dedicated creative mode sections where pixel artists share work and techniques.
Discord servers focused on Minecraft building offer more intimate communities. Many servers have specific channels for pixel art where members share projects and request feedback.
YouTube and Twitch work for video content. Time-lapses, tutorial series, or live build streams find audiences if you’re consistent and engaging.
Instagram and TikTok suit visual content. Quick screenshot posts or short time-lapse videos perform well with proper hashtags (#MinecraftPixelArt #MinecraftBuilds #PixelArt).
When sharing, include technical details builders appreciate: dimensions, blocks used, conversion tools employed, and total build time. Engaging with customization communities expands your reach beyond pixel art specifically.
Conclusion
Pixel art in Minecraft bridges gaming nostalgia, creative expression, and technical planning. The blocky medium that once seemed limiting reveals surprising depth when approached systematically, from selecting the right wool colors to mastering conversion software and advanced shading techniques.
Start small, experiment with different subjects, and don’t fear mistakes. Every misplaced block teaches spatial awareness and color theory. As your skills develop, you’ll move from recreating simple sprites to designing original pieces that define server landscapes and showcase your creative vision.
The tools keep improving, the community keeps innovating, and your next pixel art project is just a reference image away. Whether you’re building a 32×32 Pokémon or attempting a 256×256 mural, the process rewards patience and planning with monuments that outlast most other Minecraft builds.